So, recently I had the chance to use a Bluetooth speaker kit from Rockler to make my own, but I wanted to take a different approach than to just make a box. I
wanted a full functioning speaker with a phone stand, but I also wanted it to look
like a piece of art.
Introduction
Bluetooth technology has evolved over the years to the point where anything
could have Bluetooth capabilities. The smart phone obviously is the first thing
that comes to mind, but playing music from a smart phone to a wireless speaker
has got to rank high up on the list of Bluetooth uses simply for convenience. So,
recently I had the chance to use a Bluetooth speaker kit from Rockler to make my
own, but I wanted to take a different approach than to just make a box. I
wanted a full functioning speaker with a phone stand, but I also wanted it to look
like a piece of art.
PICTURE
The design
During the original thought process of the speaker design, I thought about using
dovetails as a way of adding some visual interest. I also thought about
incorporating cutouts for the phone to fit into and having a charging cable routed
through to create a charging dock. These two ideas were doable and probably
would have been great, but there were a couple of problems with both. A few
projects prior to this one, I used a slab of Osage Orange and added several
dovetails as visual interest as well as functionality, so I didn’t want to recreate
that scene again.
The problem with having a slot or groove routed into the block of wood for the
phone to stand up is that the size of the smartphones are constantly changing and I didn’t want a useless phone dock after a few months. Same thing with the
charging cable idea; I didn’t want to customize the dock to a specific charging
cable if it could possibly change after a while. Ultimately, I decided to design the
speaker and phone stand in a way that would work for different devices. The
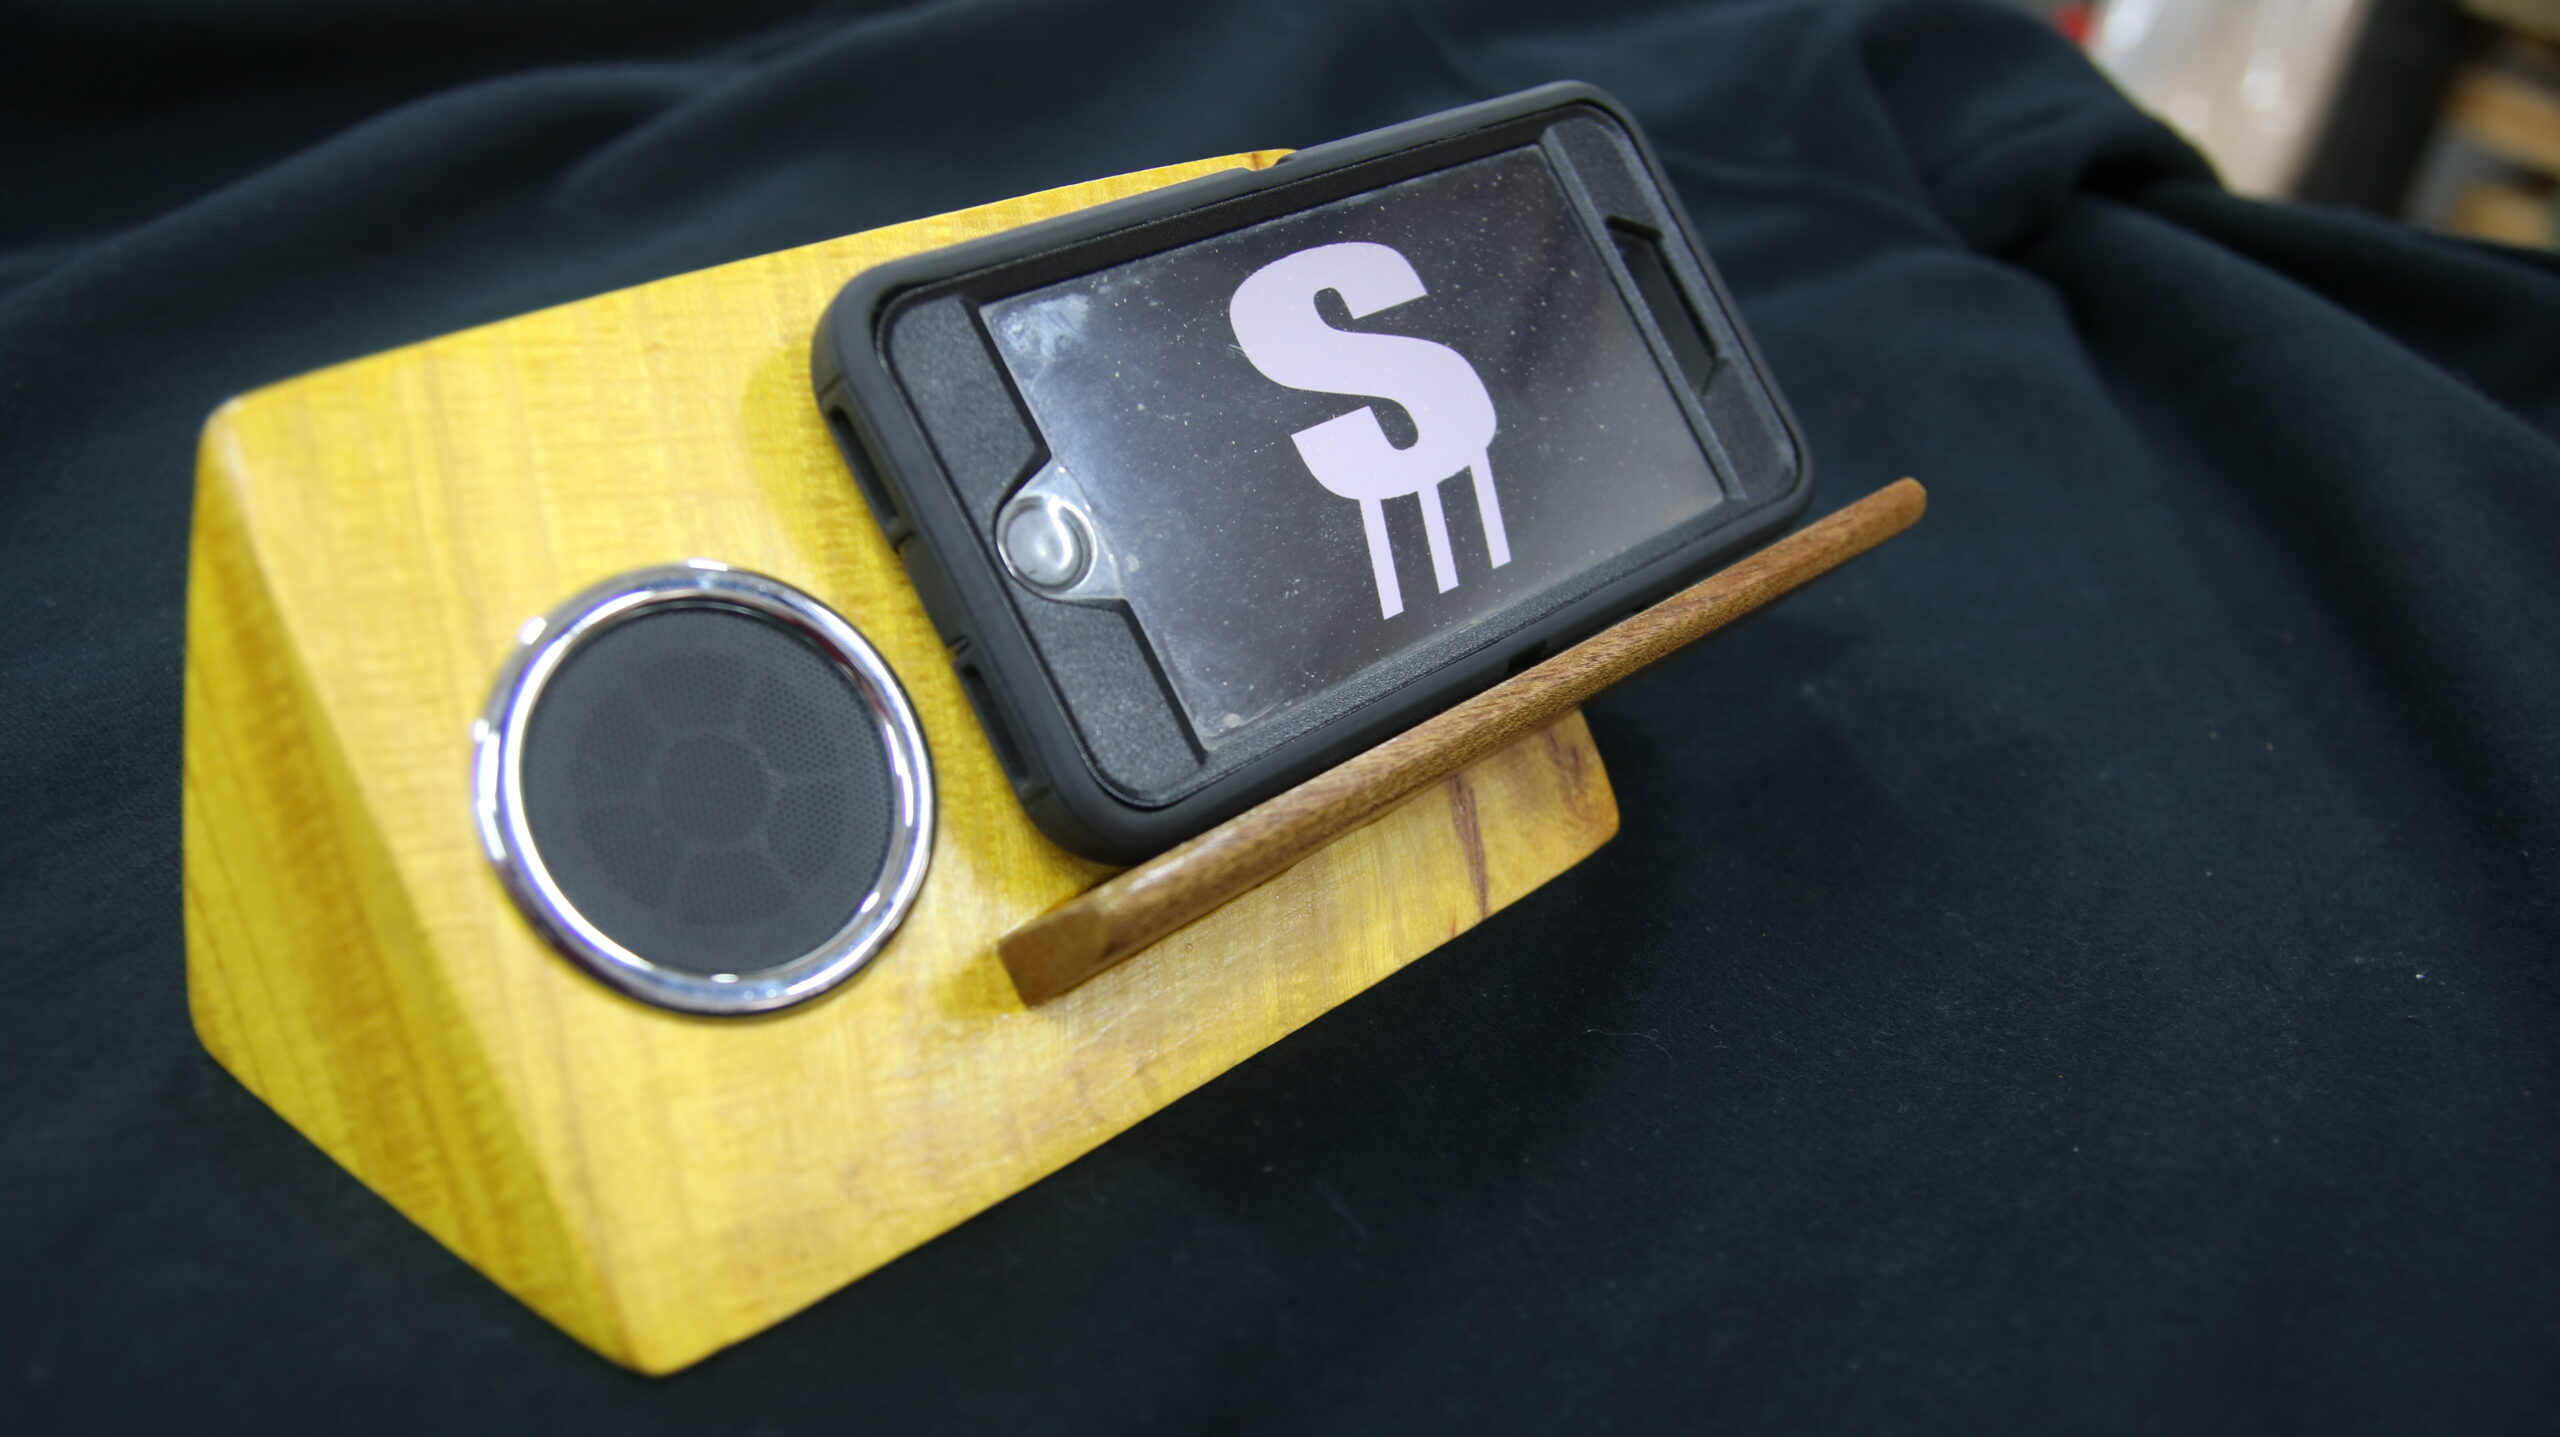
piece of wood I chose to use already had an odd shape, which worked well for
wanting something a little different with an artsy feel. Using a piece of Sapele for
the phone stand added a bit of contrast with functionality.
PICTURE
How to
The connectivity of the speaker components were self-explanatory (color-coded) and the steps to connect a Bluetooth-enabled device were very easy. The construction of the speaker housing or box of sorts is left up to you, the creator.
There’s no doubt thousands of ways to create a way to house the speaker. That is what’s fun in this project, being creative.
I started out by choosing to use an abstract cut-off piece of Osage Orange that I
had laying around. There wasn’t much I had to do to this cut-off as it already
looked “artsy” and the color was awesome. So, basically all I had to do was drill
two holes and figure out a way to create a phone stand. I started by drilling a
couple of holes with a forstner bit at the drill press. One hole would be offset on
the front for the speaker and one hole on the back in the center. These two holes
needed to be close enough in relation to one another so that I could use a drill bit
to connect the two. The reason for the connecting hole is so that the wires from
the speaker can connect to the main control.
Once the wires were fed through the hole and connected to the control, the
components could be inserted and pushed into place. If the hole you drilled for
the speaker and control board are too big there’s ways to fix it. You can either use super glue in a few spots around the edge on the underside or wrap tape around the inside edge of each component. Keep in mind, there might be a need to access the controls and battery in the future for whatever reason.
PICTURE
Finish
For the finish on this project I used a water-based Polycrylic for a couple of
reasons. Number one, I love this stuff. It shows the natural grain, but brings it to
life. I would use it on every project if I could. It is so easy to apply and the
cleanup is super easy. Rinsing the brushes out with water is all it takes for the
cleanup.
The second reason I use it is because of the dry time. I can apply a few coats and
be completely done in a couple of hours. This isn’t a sponsored post for them, it’s
just my go-to finish for almost every project.
PICTURE
What I learned
I learned a few things in this project. As a matter of fact, this project taught me to
“color outside the lines” in a way. I was always that kid that didn’t want anything
out of order and tried to keep my things in a straight line, but in this project I
allowed myself to go against that and it felt good. At first I wasn’t sure of the artsy look because of the odd shaped wood and offset phone stand, but I committed to it and was really happy with the results. I’d like to challenge myself more in the creative area of my projects. Committing to a project that is challenging in any way is good for developing your skill set, but also for broadening your creative thought process. Here’s to a new and challenging year!
PICTURE
Learn more about us
About us and our story: http://www.stoneandsons.net/about/
See our project plans: http://www.stoneandsons.net/plans/
Tools I use: http://www.stoneandsons.net/tools
Tools Used In This Project:
- Drill and imp-ct 18v, Ridgid: http://amzn.to/2DhYHbA
- Drill and drive bit set, Kobalt: http://amzn.to/2stIbf6
- Drill press, Wen: http://amzn.to/2jbR4ry
Gluing, Finishing and Accessories: - Glu-bot: http://amzn.to/2s9rpm8
- Wood glue, Titebond III: http://amzn.to/2u6CEgo
- Polycrylic, Minwax: http://amzn.to/2DjvJI9
Safety: - Safety glasses, 3M: http://amzn.to/2txHtT7
- Fire extinguisher: http://amzn.to/2ururTy
- First Aid Kit: http://amzn.to/2urwR4B
Video Equipment and Electronics: - DSLR camera and mic, Canon/Rode: http://amzn.to/2urN0qA
- Camera battery pack, Canon: http://amzn.to/2sudLcx
- Tripod, Manfrotto: http://amzn.to/2s9MHjB
- Backpack for laptop (modified for camera): http://amzn.to/2sppNsC
- Memory card, 64gb: http://amzn.to/2s9hPzC
- Memory card waterproof case: http://amzn.to/2suLliC
- Laptop, MacBook: http://amzn.to/2urnDFx
- Network Attached Storage, 6TB: http://amzn.to/2suvRLu
*Most of the links listed above are Amazon Affiliate links